After dealing with the cranky electric burners on our stove, we decided that the time had come to swap in the gas rangetop that we had bought several years ago for our new kitchen. So, in June, we decided to swap in the range before Tony's family would arrive for their yearly summer trip.
First step - remove the dark brown and vinyl print paneling that covered the wall. And yes - this is the same brown paneling that probably decorated your dad's den or family room. The printed vinyl - we had never seen this until we moved into this house (print sample). Under the paneling we found old-fashioned plaster on wood slats. How did we know that there were wood slats under that plaster? Because we ended up tearing off the plaster, which had been held up by the previously removed paneling.
At this point in our renovation progress, you would think that we would have anticipated that we would run into problems. And yes, we did expect to find some 'issues' when we removed the paneling. What we didn't expect to find was the poor job that had been done running the septic system drain line, the crumbling foundation and wood sill pieces suffering from dry rot.
|
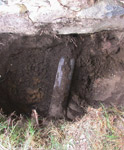
The drain pipe for the septic system exits the foundation and had a pipe that was supposed to allow the release of trapped air. But we discovered when we were digging out the dirt around the pipe that the 'air release pipe' wasn't attached to the main pipe, but was just placed on top of this hole. |
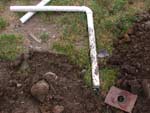
This is the 'air release pipe' that was supposed to allow trapped air out of the drain pipe. The red rectangle with the hole was a piece of rubber that was fitted around the pipe and then slapped around the main drain pipe. This was the only thing besides a thin coating of glue or adhesive that was used. |
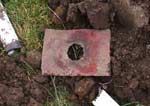
A closeup of the rubber piece. You can see the little amount of glue that was applied onto the pipe in the upper left hand corner. |
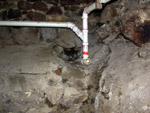
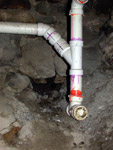
The old drain pipe from the inside of the foundation. This was 2" pvc piping and we replaced this with a 4" pipe. To do so, Tony had to drill a larger hole in the concrete. |
|
A closer shot of the old pipe. The upper portion is the kitchen sink drain, and the left hand portion is from the washing machine. Tony drew the black lines so that he would be able to match the pieces together after replacing the drain tee portion. |
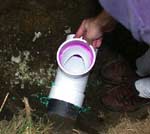
This new pvc tee replaced the old pipe seen in the first picture. We decided that 2" wasn't wide enough, and went with a 4" wide opening. |
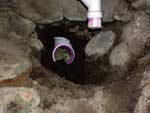
The new drain pipe tee is in place and now needs to be joined to the old 'Y' portion. |
A closer shot of the old pipe. The upper portion is the kitchen sink drain, and the left hand portion is from the washing machine. Tony drew the black lines so that he would be able to match the pieces together after replacing the drain tee portion. |
This page was last modified :
